
Summer Starts Here - Save up to 70%
To see if this custom-fit item will work for you please tell us what vehicle you'll use it with.
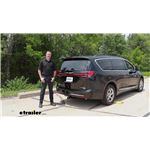
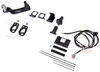
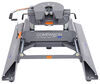
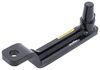
This hidden, custom-fit hitch installs behind your vehicle's rear bumper so that the cross tube is always out of sight. Fully welded, corrosion-resistant receiver easily removes when not in use.
Features:
Specs:
Draw-Tite's Tested Tough program provides testing standards far superior to those outlined by the Society of Automotive Engineers (SAE), the go-to source for engineering professionals.
Each Draw-Tite trailer hitch receiver undergoes extensive fatigue testing and static testing with the ball mount that is either supplied or recommended for use with that particular hitch, thus ensuring results that are applicable to real life use. Fatigue testing is also conducted on hitches rated for use with weight-distribution systems.
In addition, Draw-Tite performs static testing on a simulated automobile, as opposed to the rigid fixture used for SAE testing, resulting in a more true-to-life scenario.
At etrailer.com we're committed to the products we sell, and to our customers. Our experienced and knowledgeable staff are available via both phone and email to address your questions and concerns for the lifetime of your hitch. The technicians at etrailer perform hitch installations on a daily basis, making them a valuable resource for do-it-yourselfers. The one-on-one, personal service you'll receive comes straight from an expert in the towing and automotive field. We've installed it, we've wired it and we've towed with it, so whatever your question, we can answer it.

Videos are provided as a guide only. Refer to manufacturer installation instructions and specs for complete information.
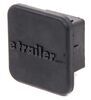
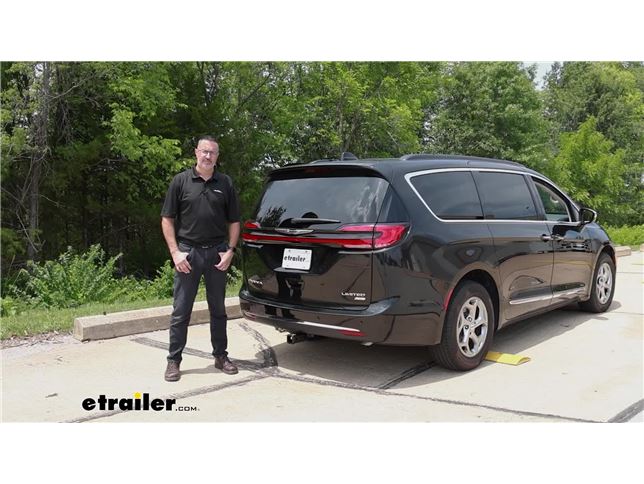
Hi, John with etrailer. Listen, if you're ready to put a trailer hitch on your Pacifica but you're not sure if you want the full-time looks of having a hitch on your Pacifica, then check out this option from Draw-Tite. This is the Hidden Hitch Stealth Receiver and we installed it in our 2023 Chrysler Pacifica. Now obviously the first feature that most people are considering when looking at a hitch like this is the fact that the receiver tube can completely come out of this with just a turn of a handle. Something I like is that Draw-Tite includes a blow molded case so you can store this when it's not in use. Keep it clean, keep it with your vehicle.
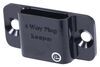
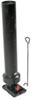
It also returns your vehicle back to the factory look. Again, it's a nice feature. You have a hidden cross tube up here so once this receiver tube's out of the way, your vehicle looks stock. Now also included in the kit is gonna be an anti-rattle pin and clip. You have a wrench also to tighten that down so when you are ready to use it, just pull it outta the case and you're gonna insert the housing up.
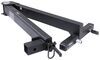
Just give it a slight kick. It's gonna lock into place. You also get two keys with this for security and you're ready to load it up. Let's talk about some capacities of the hitch here. As far as the tongue weight rating on it where it's gonna be the force pushing down on the hitch, we're looking at 350 pounds.
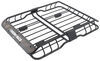
That's plenty of weight if you're looking at cargo racks or bike racks or even towing. Speaking of towing, as far as the gross trailer weight rating on this hitch, it's 3,500 pounds. Now keep in mind that's the weight of your trailer and anything you put in it or on it. Check with your Chryslers owner's manual to make sure that you can haul that much weight. Now speaking of accessories like ball mounts, cargo racks, bike racks, we'll get some measurements and see how this hitch fits our Chrysler.
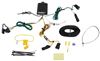
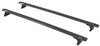
Now this is an all-wheel drive model. I don't know if that affects the height or not but just let you know what we have here today. So from the ground up to the top of the inside collar up here we're looking at 13 inches even. The other measurement we like to get is from the center of the pinhole out to the edge of our bumper fascia and we're about even, but it's gonna be 1 inch. Now these measurements are important if you're choosing accessories like bike racks or cargo racks that fold up into a stowed position. You don't want them to impact the back of your bumper or if you're choosing a ball mount you may want one with a slight rise to it to keep your trailer level with your vehicle. Now speaking of towing, if you will be using the safety chain loops under here these are plate style, they're welded on and you do have plenty of room for standard S hook style but if you have a heavier duty clevis style like this you're gonna have trouble getting them in. You may want to use some quick links instead and have those down so that you have better accessibility. As far as the finish on this hitch, we do have a round tube. This is powder coated black. Like I said, it fits under your vehicle anyway. It really blends in nice with the Chrysler here. As far as installing the hidden hitch on the Chrysler it's not too bad. I would recommend if you have a set of ramps to be able to get the back end up higher. There's a lot of work that needs to be done underneath. There's panels that we have to take off but there's no cutting or drilling or welding. This is just a straight bolt up hitch and I like the construction of it. I like that you could take the receiver tube off if you don't wanna look like you have a trailer hitch on the back of your van the entire time. So if you wanna see how we installed it on our Chrysler today, stick around and I'll show you step by step. Now to begin the installation we're gonna wanna remove this lower underbody panel and depending on what model you have the fasteners are gonna be all different for you. Just a side note, the exhaust is sitting 7 inches off of the ground here. This is an all-wheel drive model. If you have a set of ramps, this is gonna make your installation a lot easier. You need a lot of ground clearance here. We're gonna start get this under panel off. I know a lot of these fasteners are 8 millimeter and 10 millimeter. (drill grinding) Definitely check around the edges. We have some even on ours that are up behind the rear tire here. (drill grinding) So I went around all of the perimeter on this. You're gonna have one in the middle. You're gonna need a slotted screwdriver and you're gonna unscrew it. But just put some downward pressure on it and this should thread out of there. Okay, we can set this off to the side. Now we need to get the exhaust out of the way. You're gonna have two exhaust hangers, one right here in the middle, and then you're gonna have one up high by the tailpipe. Before you do that, get a cam buckle tie-down strap and just hook up to your coil springs. That'll help support this exhaust. Of course, if you're doing this on the ground, the exhaust really doesn't have that far to go anyway but it's a nice precaution just to make sure nothing happens. So I've already sprayed these. You can use soapy water and use a lot of it because it makes a big difference when you get these off. If you have enough, you can actually take 'em off with your hands a lot of times. Now the older ones are gonna be stuck and it's gonna be harder to do and so you can use a pry bar, but the difference really is huge if you have these things lubricated well. It doesn't matter which one you take off. Whichever one wants to come off, let it come off. Now we need to disconnect our rear sensor. It's for the proximity sensor for your keyless entry back here. You're gonna see in the middle of your bumper you're gonna see like it's plastic housing here there'll be a tab on the very backside that if you put your finger in here you can bend the tab backwards and push the entire sensor. It'll be a little bit easier to disconnect then. We're gonna have a tab here. It'll come out like this. Just kind of push the whole thing. We're gonna set this off to the side. We will be hooking this back up but we need to trim this housing. We're gonna leave the bumper support. We don't want our bumper flopping so we're gonna cut this straight down on either side. Get rid of this box. (saw grinding) Now it's time to get our bolts into the frame. In your kit you're gonna have a fish wire, carriage bolt and a plate washer. Now you're gonna have different size plate washers. So how this is gonna work for us, the big one is gonna go towards the front of the vehicle. It'll actually be right here and then you're gonna have the two smaller ones. We've marked the holes that you're gonna be using here and here. So how this fish wire is gonna work is we're gonna want to fish wire from the furthest point we're gonna be using this hole from the factory here. Everything will fit in right here. So we'll put the coil end in the furthest hole first. There we go. And bend that very end of it just to keep it from going up into the hole on you. Once you have that through we're gonna take the smaller washer here and just thread your bolt on to the spring. Grab the end of your wire. Now you wanna send the washer through first. Try to get it pretty far away from the carriage bolt. It'll just make your life a little bit easier getting these two to come back together. And then just pull it through just like this. Now repeat that same process for this one and we'll show you how to reverse fish wire this hole here. Now when you're doing this next hole here make sure that your washers don't overlap up there. Make sure you've got space and they're down solid on the frame. We're good here. So we'll move on to this hole. And it's basically the same thing. Still gonna put the washer on in the carriage bolt. You're just gonna send the bolt out of the way. Might get jammed up there a little bit. Again, make sure this is sitting flat. I don't know if I had a weld up there that was holding it up or not, but we're good now. So leave these wires attached. These are gonna help us when we raise the hitch up into position. Now do this exact same process on the other side. Before you raise your hitch into position you wanna make sure that you're not gonna be pinching any wires. In our case, we would be on the driver's side. We have got a frame ground right here. This is gonna be a 10 millimeter. Again, according to trim packages and everything else you may or may not have this, so just double check the areas. (drill grinding) to make sure you're not gonna pinch any wires. The hitch is gonna have cutouts for this and we're gonna be reinstalling that, but we need it out of the way right now. Now with an extra set of hands, we're gonna raise the hitch into position. This is gonna require us to run these fish wires through the holes in the hitch. Now on the driver's side here, the very first or the closest hole, leave that one alone. That's for the stud with the electrical sensor. So we're gonna go in this one here and of course the back one, will go back there. Similar things to look out for on the passenger side as well. So we can raise the hitch in the position. You wanna be careful not to knock the bolts back up into the frame, but that's why we left the wires on. Now your kit's gonna come with flat washers and a nut. Now these washers have teeth and we want the teeth facing the hitch. This part can get kind of tricky. If you have to you can put a little side pressure on that bolt to keep it from spinning. So just work your way down, whichever ones you can get on right now, get 'em on. It doesn't matter, just kind of going finger tight until we get 'em all on and then we can snug 'em up. Torque these to the specs that you're gonna find in the instruction manual. If you don't have a torque wrench, a lot of auto parts places we will lend them for free. Now with the hitch torqued to spec there's a few more things we need to do to button up this installation. One, the proximity sensor. If you take a look over here on the hitch this is gonna be the tab that I was talking about. This is where we're gonna relocate this sensor. You can see the electrical connector right here. The kit's gonna come with zip ties, so we're gonna hook it up or we're gonna zip tie it right here. A little note here, the kit is gonna come with three zip ties. Make sure that you put your sensor on the bumper side of the bracket like this and facing the same direction as when we took it off. You're gonna get the the best response out of the sensor this way. And don't forget if you unhooked any electrical connectors don't forget to replace those. Now we can raise our exhaust back up into position. You may have to pull out on this panel down here. And while you're under here, remove the cam-buckle tie down strap. Open up your case and you're gonna pull out the receiver. This may be locked. If so, your keys will be zip tied to the inside of the receiver tube. Just gonna rotate that. Pop that off. There'll be a plastic cover on the inside that you need to install. Now this will get bolted up into position. You can see that this front section here this is gonna be facing towards the bumper. Bolts are gonna get a washer and these bolts will install from driver's side to passenger side. Both of them. Line that up into position. Our little proximity sensor is kind of in the way but I just slid it out of the way for right now. Now the locking hex nuts will go on the passenger side and you're gonna torque these to the specs that you're gonna find in the installation manual. Now with your receiver housing properly torqued you can insert the receiver tube into it. It'll go in, you'll push up and then just pull down slightly on the edge of the tube and it'll lock into position right here. Pretty much that's gonna do it for the installation. And that was a look at the Hidden Hitch Class 3 Receiver Hitch on our 2023 Chrysler Pacifica.
Do you have a question about this Trailer Hitch?
Info for this part was:
At etrailer.com we provide the best information available about the products we sell. We take the quality of our information seriously so that you can get the right part the first time. Let us know if anything is missing or if you have any questions.


Thank you! Your comment has been submitted successfully. You should be able to view your question/comment here within a few days.
Error submitting comment. Please try again momentarily.